Blog
Make Your Own Fibreglass Wall Sculpture

This beginner project will show you how to make a 600 × 400 mm abstract fibreglass wall sculpture using a simple shaped form.
Finished size: Approximately 600 × 400 mm
Difficulty: Beginner
Time: 1–2 days of hands-on work, plus curing time
Finish: Painted or decorative
Method: Fibreglass laminate over a temporary form
The design can be an abstract wave, flowing leaf, geometric shape or organic sculpture.
For one sculpture approximately 600 × 400 mm:
You’ll need:
Download the visual step-by-step guide and compare your project against it to ensure you’re moving in the right direction.
Step 1: Design Your Sculpture
Start with a simple drawing.
For a first project, try an organic wave shape: Don’t worry about making it perfect.
The beauty of abstract wall art is that irregular curves and asymmetry can make the piece more interesting.
Mark the approximate 600 × 400 mm overall dimensions.
Step 2: Create Your Form
The form provides the shape that the fibreglass will follow.
For a beginner project, lightweight rigid foam or another suitable modelling material can be used to create a raised, curved shape.
Cut the material to your desired outline.
Then gradually shape the surface using a knife, rasp or sanding block.
Take your time.
The fibreglass will reproduce the underlying shape, so every bump and indentation can potentially appear in the finished artwork.
Beginner tip:
Stand back regularly and look at the form from different angles.
A sculpture that looks good from directly above may look completely different when mounted vertically on a wall.
Step 3: Prepare the Form
Make sure the surface is:
- Clean
- Dry
- Stable
- Smooth enough for your intended finish
Apply a suitable release system if your chosen form requires one.
Always check compatibility first. Some resins can attack certain types of foam or other modelling materials.
If you’re using foam, use a resin/system specifically compatible with it or protect the foam with an appropriate barrier.
Step 4: Cut the Fibreglass
Before mixing resin, cut your fibreglass mat into manageable pieces.
For a curved sculpture, pieces approximately 100–200 mm wide are easier to manipulate than one huge sheet.
Prepare all your pieces before you begin laminating.
This is important because once resin is mixed, you have a limited working time.
Step 5: Mix the Resin
Read the resin manufacturer’s instructions carefully.
Measure the resin and hardener/catalyst accurately using the specified ratio.
A digital scale can help where the manufacturer’s instructions specify weight-based mixing.
Mix slowly and thoroughly.
Never improvise the catalyst or hardener ratio. Too little may prevent proper curing; too much can create excessive heat or other problems depending on the resin system.
Step 6: Apply the First Layer
Brush or roll a layer of resin onto the form.
Place your first piece of fibreglass mat onto the wet surface.
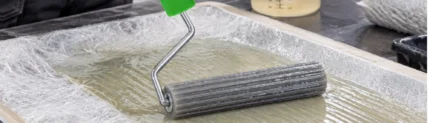
Then work resin through the mat using a brush or laminating roller.
The glass fibres should become thoroughly wetted.
You want the reinforcement saturated with resin, but avoid creating pools of excess resin.
Use the laminating roller to help remove trapped air.
Step 7: Add Additional Layers
Continue placing pieces of fibreglass until the entire sculpture has been covered.
For this decorative wall piece, two or more layers may be appropriate, depending on the shape, size and structural requirements.
Pay particular attention to:
- Sharp corners
- Deep curves
- Edges
- Thin sections
- Areas where hanging hardware will attach
The final thickness should be determined by the requirements of your particular resin/fibre system and the sculpture’s intended use.
Step 8: Allow It to Cure
Leave the sculpture undisturbed according to the resin manufacturer’s curing instructions.
Don’t rush this stage.
Temperature and humidity can affect curing time.
The piece should be properly cured before you attempt major trimming, sanding or finishing.
Step 9: Remove the Form
Once cured, carefully separate the fibreglass shell from the form.
If the form is intended to remain inside the sculpture, you can instead leave it in place.
For a lightweight decorative sculpture, removing unnecessary core material can reduce the finished weight.
Trim the edges using appropriate tools and protective equipment.
Step 10: Fill Imperfections
Don’t worry if your first laminate isn’t perfect. Small imperfections can be corrected with a suitable finishing/body filler.
Apply a thin layer where necessary. Allow it to cure and then sand progressively.
Start with a coarser abrasive for shaping and move to a finer abrasive for finishing.
Avoid excessive sanding that could expose or weaken the fibreglass reinforcement.
Step 11: Prime the Sculpture
Clean away sanding dust.
Apply a primer compatible with both the cured composite surface and your chosen topcoat.
Allow it to cure according to the product instructions. Lightly sand between coats if recommended.
A good primer can make a significant difference to the final appearance.
Step 12: Choose Your Finish
Now comes the creative part.
| Option 1 — Modern Matte | Option 2 — Metallic | Option 3 — Stone Effect | Option 4 — High Gloss | Option 5 — Two-Tone |
|---|---|---|---|---|
| Use a matte black, white, beige or charcoal finish for a minimalist interior. | Gold, bronze, copper or silver can turn the sculpture into a dramatic feature. | Use layered colours and texture to create a marble, concrete or sandstone appearance. | A glossy colour can give the sculpture a contemporary, almost ceramic appearance. | Paint the raised sections one colour and the recessed areas another. This can dramatically emphasise the sculpture’s contours. |
Step 13: Add Hanging Hardware
Before mounting the artwork, determine its weight and the type of wall it will be attached to.
For a larger or heavier sculpture, reinforce the mounting area during fabrication rather than simply attaching hardware to a thin fibreglass shell.
Use wall anchors/fixings appropriate for the wall construction.
For valuable, large or heavy installations, consider professional installation.
Step 14: Install Your Artwork
Choose a wall where light will interact with the sculpture.
This is particularly important with three-dimensional artwork.
A light source positioned from the side can create shadows across the curves and make the piece appear dramatically different throughout the day.
Step back from the wall and check the artwork from several angles before finalising the position.
Turn One Sculpture Into a Collection
Once you’ve mastered your first piece, don’t stop there.
Create a series of three sculptures using the same basic form but different:
- Shapes
- Colours
- Textures
- Sizes
- Finishes
- Lighting
A collection of smaller fibreglass sculptures can create a dramatic feature wall without the cost and weight associated with many traditional sculptural materials.
The Creative Possibilities Are Almost Endless
Fibreglass gives a fascinating combination of form, strength and creative freedom.
You don’t need to start with a complicated sculpture.
Start small. Learn how your materials behave. Experiment with shapes and finishes.
Then take what you’ve learned and make something that is uniquely yours.