Blog
How to Use a Fluted Fibreglass Roller: A Beginner’s Guide
How to Use a Fluted Fibreglass Roller
When working with fibreglass and resin, getting the reinforcement properly saturated and removing trapped air are essential for creating a strong, professional laminate.
One of the most useful tools for this job is the fluted fibreglass roller.
It may look like a simple tool, but using it correctly can make a significant difference to the quality of your finished fibreglass project.
What Is a Fluted Fibreglass Roller?
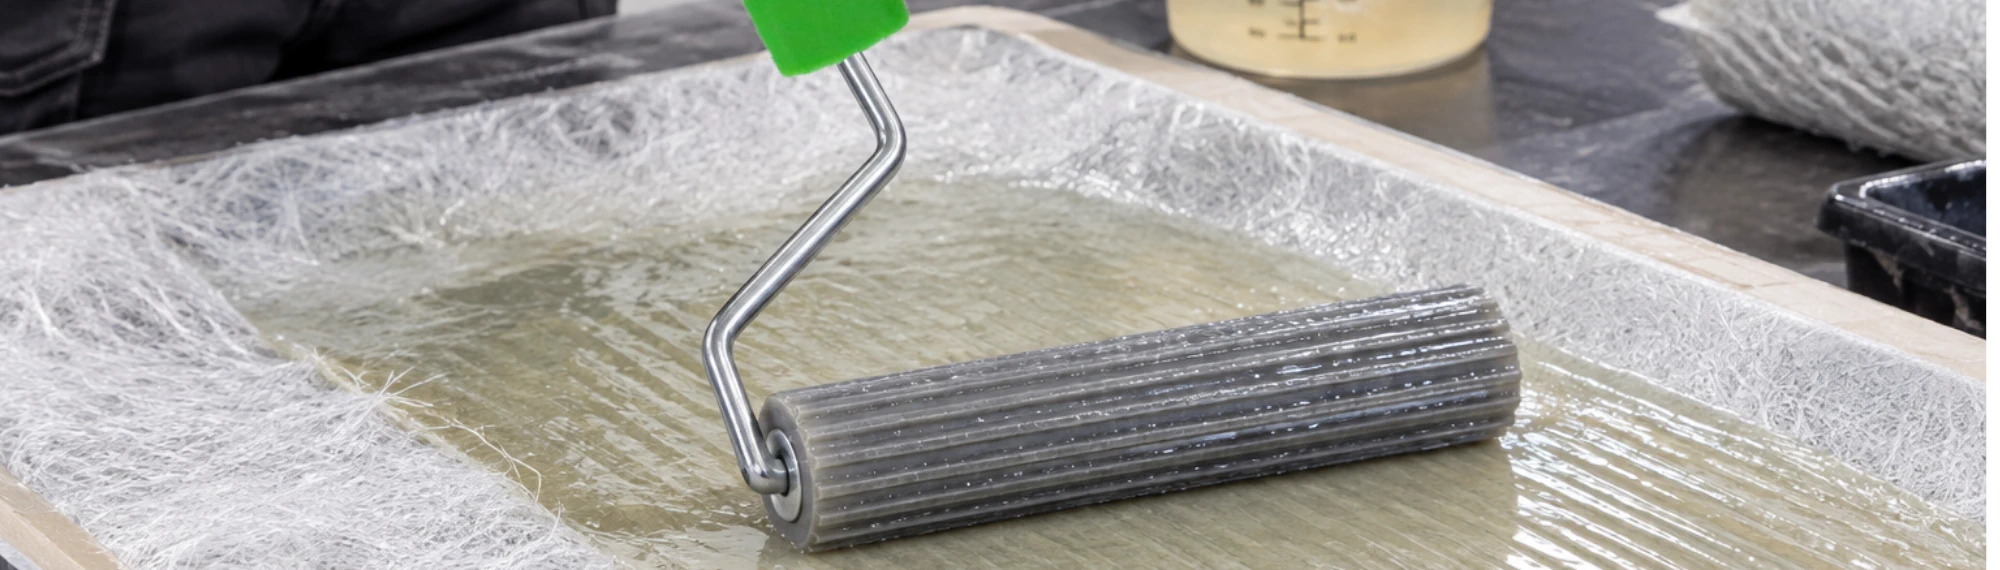
A fluted fibreglass roller is a hand-operated laminating tool with a grooved or ribbed roller head.
It is designed to help:
- Push resin through fibreglass reinforcement
- Remove trapped air
- Consolidate the laminate
- Improve contact between layers
- Reduce air bubbles and voids
- Help distribute resin more evenly
The grooves in the roller help work resin through the fibres while allowing trapped air to escape.
What You’ll Need
Before you start, prepare everything you need.
Materials
- Fibreglass mat or cloth
- Compatible laminating resin
- Correct catalyst/hardener
- Suitable mould or prepared surface
Tools
- Fluted fibreglass roller
- Disposable brushes
- Mixing containers
- Mixing sticks
- Scissors
- Digital scale, where required by the resin system
- Scraper or spreader
Safety Equipment
- Chemical-resistant gloves
- Safety goggles
- Protective clothing
- Appropriate respirator
- Suitable ventilation
Always follow the safety instructions and technical data sheet for the resin system you’re using.
Preperation
The Correct Rolling Technique
Don’t simply roll back and forth as quickly as possible.
Instead, work systematically.
- Start in the centre – Begin near the centre of the laminated area.
- Work towards the edges – Gradually move the roller towards the outside of the laminate. This helps drive trapped air outward rather than trapping it underneath the reinforcement.
- Overlap your passes – Each pass should overlap the previous one. This helps ensure the entire area has been consolidated.
- Use controlled pressure – You don’t need to crush the laminate. Too much pressure can move the reinforcement out of position or push excessive resin away from the laminate. Use enough pressure to consolidate the fibres and release air.
How Do You Know When You’ve Done Enough?
A properly consolidated laminate should have a relatively consistent appearance.
Look for:
- Good resin wet-out
- Fibres lying flat
- Minimal visible air pockets
- No large wrinkles
- Good contact with the mould or surface
If you see a small air bubble, work the roller over that area and move the air towards the nearest edge.
Don’t simply bury an air pocket underneath another layer.
Working Around Corners and Curves
Corners can be challenging.
Don’t force the roller aggressively into a tight corner. Instead, use a smaller roller or brush where necessary.
For difficult curves:
- Use smaller pieces of reinforcement.
- Position the fibreglass carefully.
- Wet it out gradually.
- Use the roller to consolidate the laminate.
- Use a brush for areas the roller cannot reach.
The goal is a smooth, fully wetted laminate—not speed.
When Adding Multiple Layers
If your project requires multiple layers of fibreglass, each layer should be properly consolidated.
Apply the next layer according to the resin system’s recommended laminating process.
Use the fluted roller again to:
- Remove trapped air
- Consolidate the new layer
- Encourage proper bonding between layers
- Maintain an even laminate
Avoid simply adding layer after layer without checking for air pockets and proper wet-out.
Common Mistakes
Cleaning Your Fluted Roller
Cleaning the roller immediately after use is much easier than trying to remove fully cured resin.
Follow the cleaning procedure recommended for your particular resin system.
If resin is allowed to cure on the roller, the tool can become difficult or impossible to clean effectively.
For larger projects, keeping spare rollers available can save time if one becomes unusable during the job.
The Secret Is Consolidation
A fluted roller isn’t simply a tool for spreading resin.
Its real purpose is laminate consolidation.
Used correctly, it helps turn a wet layer of fibreglass and resin into a more uniform composite by improving fibre contact, distributing resin and helping remove trapped air.
Take your time, watch the laminate as you work, and don’t be afraid to use a brush in areas where the roller can’t reach.
With practice, the fluted fibreglass roller can become one of the most valuable tools in your fibreglass workshop.